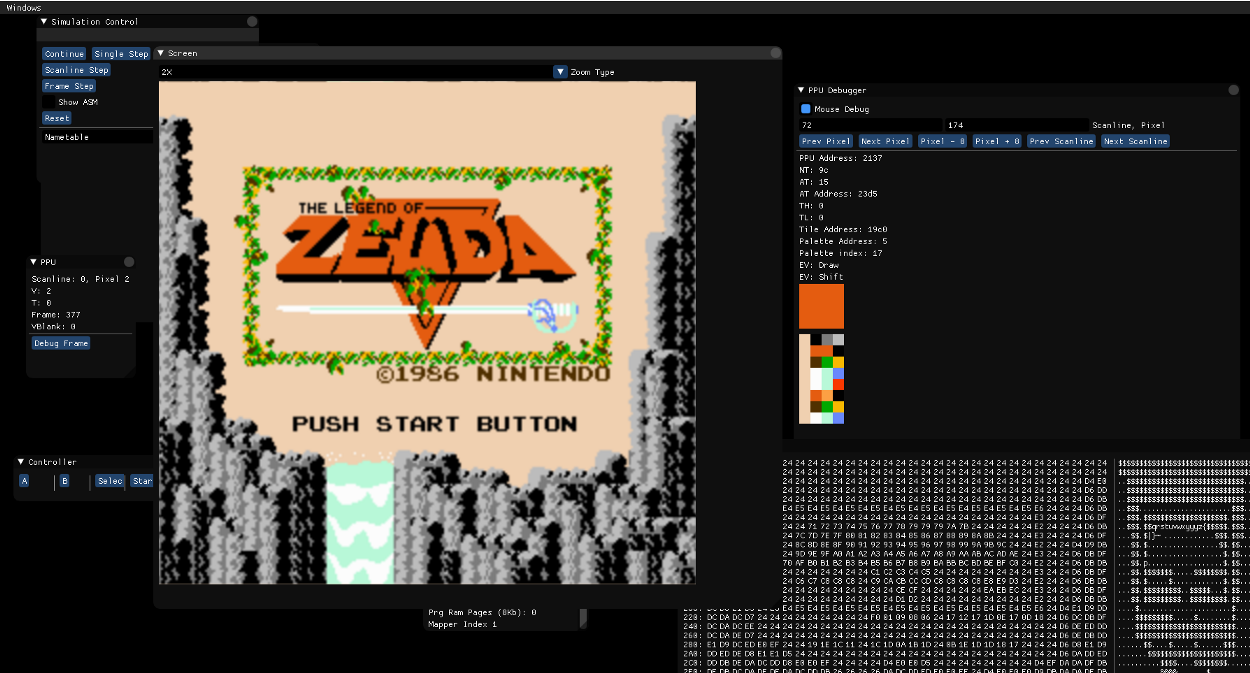
Legend of Zelda emulated plus debugging windows.
Hello everyone!
Today I release the source code of my bare-bone NES emulator, written in C++.
I had the idea to write an emulator of one of my favorite console (after the SNES) years ago, and started in 2015 to write the first code (actually in 2008, but it was too daunting even to start). Then I concentrated on my other big project (still ongoing) and left all the NES code on a side. Years passed and finally last winter I decided to give it a go to arrive at a ‘usable’ emulator level and release the source code.
Here it is! (https://github.com/JorenJoestar/HydraNes)
Motivation
Main motivation both to write and to share this code is knowledge.
I shamelessly wrote bad code just with the purpose of seeing something on screen as fast as I could. And I am very honest about that: not happy for the form, but happy for the knowledge I gained! Also, I think that this code is compact enough to be followed and to understand the basics of NES emulation coding.
The code
The NES code lives in the Nes.h/.cpp pair of files. The APU is implemented using Blargg’s implementation: when I’ll have other time I will attemp to finish my own implementation, but for now it is ok like that.
The flow is the following:
- NES is initialized
- After loading a rom (from the Cartridge window) the mapper will be selected and memory copied to local buffers.
- CPU starts its continuous emulation.
- CPU will execute until a frame is produced. This is checked by the PPU frame changing.
- PPU execution is bound to memory accesses, both read and write.
- Each CPU memory access corresponds to 3 PPU cycles (in NTSC, the only region emulated).
- After the frame is ended the APU emulation is advanced.
Interesting spots
There are different areas of the code that are interesting, but I would like to highlight some.
Cpu::Step()
This is where all the CPU instructions are executed. I opted for a macro based approach instead of tables of function pointers.
For each cpu cycle:
- Fetch the instruction opcode
- Calculate the operand address (called ‘effectiveAddress’)
- Execute the operation
All the operations and addressing modes are in the Nes.h file. Addressing modes are the way the NES gets its operand for each operation. Operations are the instruction themselves — using those operands.
Ppu::Step()
PPU by itself is the most difficult part to emulate (APU is easier on the channels, but harder on the mix and signal generation!).
I will make a post about that soon, but in the meantime here the code is and implements the behaviours described here:
https://wiki.nesdev.com/w/index.php/File:Ntsc_timing.png
The PPU draws in tiles of 8x8 pixels, so for each pixels created on the screen there will be a gathering of all the data necessary to calculate the final color.
The rendering is divided in background and sprites.
Background is just 8x8 pixel per tile choosen from the nametable (a screen table of which tiles are visible) and sprites are either 8x8 or 8x16 rectangles coming from a different memory area (uploaded using DMA).
There are many quirks and uniqueness about the PPU, like the pattern table (a 16x16 grid storing the higher 2 bits of all the underlying background pixels), or the vertical blank period, or the open bus.
Ppu::DrawPixel()
The color of a pixel comes from one of the 16 entries of the palette VRAM, and to do so 4 bits must be calculated for background and for sprites.
For background tiles, 2 pixels comes from the ‘texture’ (CHR-ROM) and 2 from the attribute table. Sprites contains all those informations together.
The output is a silly SSBO that contains RGBA colors to be used in a compute shader that outputs to the screen.
CpuRead/Write, PpuRead/Write
All those methods are essential because the NES uses memory mapping i/o to access the different hardware.
For example the PPU access the cartridge through the mapper in the memory controller to read drawing informations, the CPU writes to the PPU using address $2007, etc.
Ending notes
I will prepare more detailed posts about the NES architecture and emulation, even though there are still some concepts that are not clear to me and require a deeper investigation.
So far this is the most satisfactory personal project I’ve done, and one of the few that arrived at a usable level.
In the future I want to improve this emulator and use the knowledge to explore the writing of a SNES emulator!
Any question or comment please let me know!
Gabriel